| Modeling/ Particles |
Particles
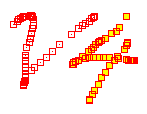
Particles are objects with a very simple geometric description. Due to their simplicity, they are memory efficient and a large number of them can be created. Phenomena such as water drops, fur, fog and fire, can be simulated using particles. Particles can be rendered in a variety of ways: as small dust particles, lens flares or foggy spheres, to name a few examples. Despite their simplicity, the rendering engine of Realsoft 3D can make particles look very interesting. For example, particles can be textured just like other geometric objects. Creating particlesThe Particle tool allows you to create particles interactively. To create a flock of particles: 1. Activate the particle tool. When you activate the tool, the Control Bar shows you a number of particle specific options.
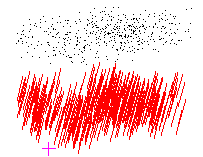
2. Specify desired options from the Control Bar. To get started, just use the default values. Then create particles interactively through the view window by holding down the left mouse button while moving the mouse. When done, accept the tool by clicking the right mouse button and selecting 'Accept' from the opened pop-up menu. You can also 'airbrush' particles on the surface of the selected objects. To do this, set the 'Surface' option of the particle tool. Orientation of 2D and 3D particles will then be determined by the orientation of the underlying surface. This option allows you to create easily fur and hair for objects. Below is a description of particle tool specific options.
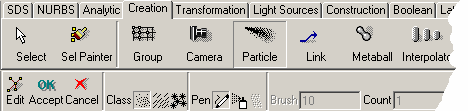
Particle tool options Class The type of the created particles. Currently three kinds of particles can be created:
Pen Currently there are three pens available:
This field controls the radius of the airbrush particle tool. The size is measured in pixels. Count Defines the number of particles created per each mouse movement when using the brush and selected object pens. Project This option controls the depth coordinate of particles added by the brush pen. Three choices are available:
Size Defines the size of created particle items. Rnd Size Randomizes the size of created particle items. 0=constant size, 1=fully randomized size. Rnd Dir Randomizes the direction of created particle items. 0=fixed orientation, 1=quite random orientation dominated by original direction, 10=totally random orientation.
Modifying particlesParticles can be modified just like any regular objects, such as spheres and NURBS curves. For example, you can modify the created particle flock by using the move tool with 'Collision Deformation' option set.
When you select a particle object, the control bar automatically shows you all particle specific tools. You can also enter the edit mode to single point edit the particles.
You can use any of the available tools, such as move, rotate or bend, to modify the selected particles. You can duplicate points simply by dragging them while holding down the copy modifier key 'Ctrl'. Properties of particlesAll common object properties, such as name, color or mass, can be modified through the property window. The color of a particle object can be defined in the usual way using the property window's 'Col' tab. The default scanline shading of particles does not look especially pretty.
Particle specific options can be controlled through the Property Window's 'Spec' tab. There are three sub tabs:
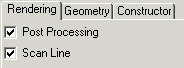
Rendering tab Particles can be rendered using scanline, post processing and ray tracing techniques. These are not exclusive: you can render a scanline particle and add a post effect on top of it. For more information about how to define visual appearance of particles, see the 'Post processing' chapter. Scan line rendering The color, optical and other surface properties of scanline rendered particles can be defined in the same way as those of any regular objects - by using the material system. For example, you can texture map scanline particles using the 'wood' material of the default material library. To texture particles:
The UV space of 2D particles is three dimensional. 'U' runs along the length of a particle. 'V' runs perpendicular to the direction of the particle (from the axis towards the edge). The 'W' coordinate runs with the order number of the particle. Using the UV coordinates, you can define materials, which for example, make 2D particles look like 3D cylinders, cones, or hairs. And of course, 2D particles can also be bump mapped, clip mapped, they can be transparent or reflect light.
Scan line rendered 1D and 2D particles are visible in ray racing. For example, other objects can cast shadows on particles. The only drawback with scan line rendered particles is that they are quite memory consuming. However, a high render box count in rendering decreases memory consumption.
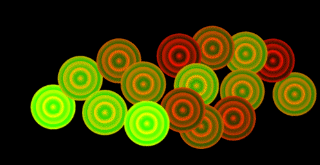
Post Processing In addition to scan line rendering, also post processing can be used for rendering particles. To do this:
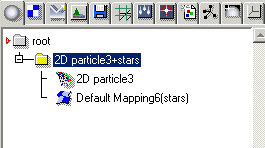
As expected, this creates the following object hierarchy:
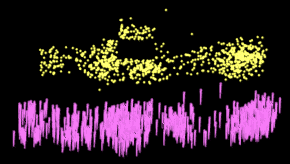
Rendering this shows a number of stars.
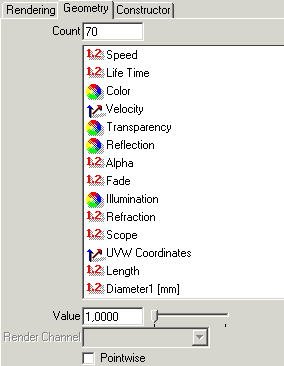
Note that both rendering methods (scanline & post processing) can be used simultaneously. For example, you can use the scan line particles to render hairs and then use post processing to make the hairs glow. The 'Geometry' tab controls particle specific properties such as size and length.
Particle specific properties The 'Geometry' tab consists of the following fields: Count Controls the number of particles. If you increase the count, position and other properties of added particles are computed by interpolating the existing particles. Properties This list view allows you to select and define particle specific properties, such as length and speed.
The rest of the fields in this tab are used for defining initial values and other properties for the selected property. Value This gadget shows the value of the selected property. For example, to modify the length of 2D particles:
Uniform length defined for 2D particles Pointwise Each property can have a uniform value or it can be defined per particle. Uniform means that the all particles in the object share the defined property. For example, by setting the particle length property to 0.1, all particles become 0.1 meters long. By checking the 'Pointwise' box, you can assign an individual value for each particle. Render Channel This gadget selects a channel for holding the value of a pointwise property in rendering. For example, you can define that a dynamic float channel 'Age' holds the value of the 'Life Time' attribute of particles. Then you can make a simple VSL material, which reduces the color of particles by the 'Age' channel.
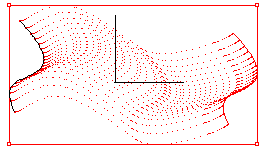
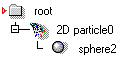
Constructor tab Constructor This control allows you to control the shape of the particle flock using other geometric objects. 'Distribute over surface' option distributes the particles over the surface of the sub objects. To use this feature: 1. Create some 2D particles and create a sphere inside the particle object.
2. Select the particle object and open the property window. Go to the 'Spec/Geometry' tab and activate the 'Distribute over surface' constructor. 3. Modify the sphere. Particles remain distributed over the sphere.
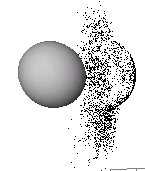
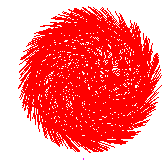
2D particles distributed over a sphere.
Animating particlesParticles can be animated in the same way as any geometric objects. Key framing and Morphing Particles Particles can be key framed the same way as other geometric object. For example, to 'morph' particles, simply turn on animation recording and single point edit the particles. Path Animations Particle objects also support path animations. For example, you can use point wise mapping to map particles to a path to achieve animated path deformations:
Simulations Particles are often animated using the simulation system. For example, you can use a number of 1D particles as meteorites acting under the influence of a gravity field caused by a planet. To do this:
Note: using the simulation system to control particles does not differ from using the simulation system to control any regular object. However, note that particles don't have 'volume', and therefore two particles cannot collide. Particles can collide with true 3D objects, such as spheres, without any problems.
|


|
|
|